Mastering Shadow Company Tier 3: Scatter Mission Walkthrough
Master the Scatter mission in Warzone DMZ: down the Commander Helo for Konni plans and flush guards with a decoy on Ashika Island.
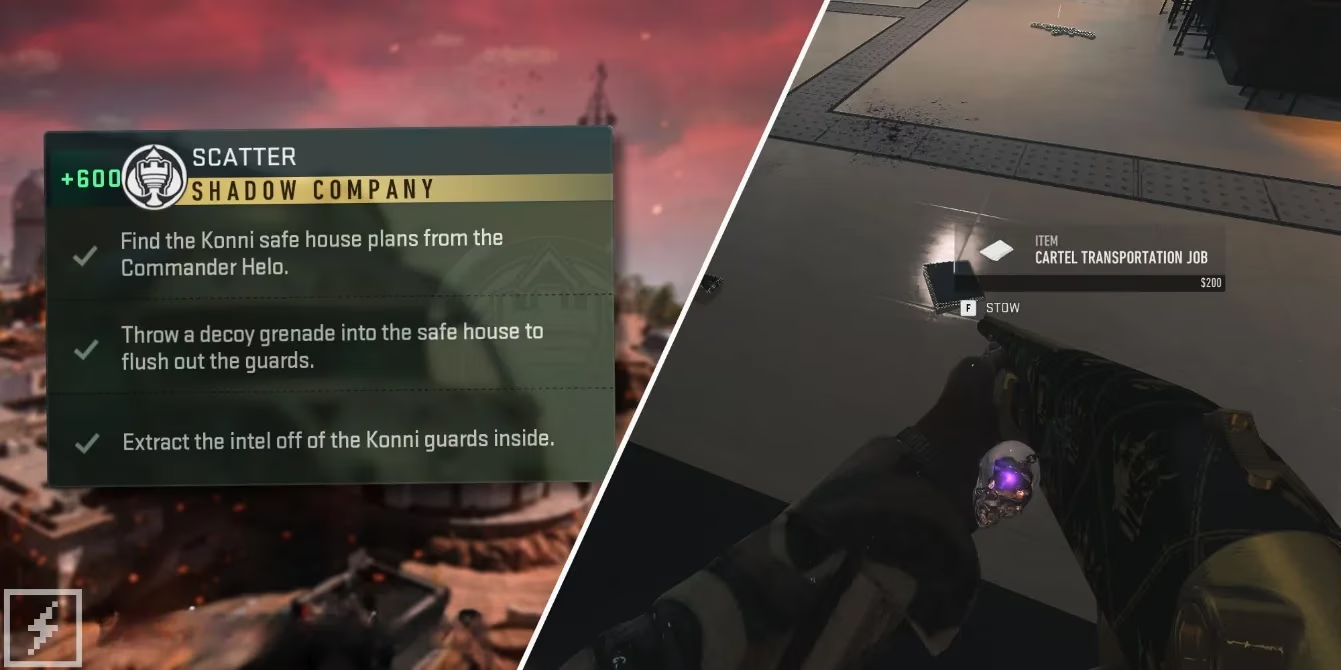
Shadow Company’s Scatter mission stands as one of the most tactically layered story operations introduced in Warzone DMZ. Since its debut with Season 5 Reloaded, it continues to test operators who reach reputation level 10 with the faction, requiring a blend of aerial combat prowess, environmental deduction, and close‑quarters execution. The mission briefing may seem straightforward—obtain safe house plans from a high‑value aerial target, flush out hidden guards with a decoy, and extract their intel—but each objective unfolds like a puzzle box whose pieces are scattered across Ashika Island’s volatile landscape. Completing it not only unlocks Tier 4 of Shadow Company but also rewards the exclusive “Of The Shadows” emblem and a substantial 20,000 XP boost.
📦 Finding the Konni Safe House Plans from the Commander Helo
The first thread to pull in this operation begins with the Commander Helo, a vehicular boss that roams the skies like a metallic raptor circling its hunting ground. Operators can track its flight path on the tac map across Al Mazrah, Ashika Island, and Vondel, but for Scatter, Ashika Island is the mandatory theatre. Unlike static objectives, the helicopter drifts with a deliberate unpredictability, forcing squads to either chase it across the map or predict its rotation. The most efficient method is to commandeer a SAM Site, allowing its homing missiles to tear through the helo’s reinforced plating. Alternatively, concentrated fire from armor‑piercing rounds or launchers can ground the machine, though this approach demands patience—as if trying to bring down a wasp nest with a slingshot while the rest of the swarm harasses you.
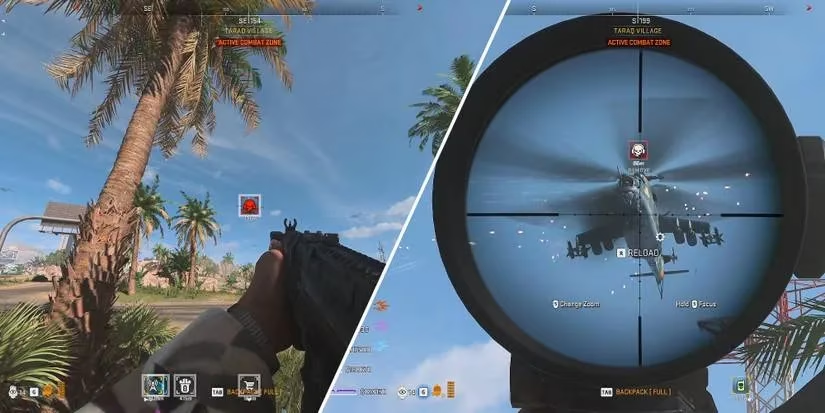
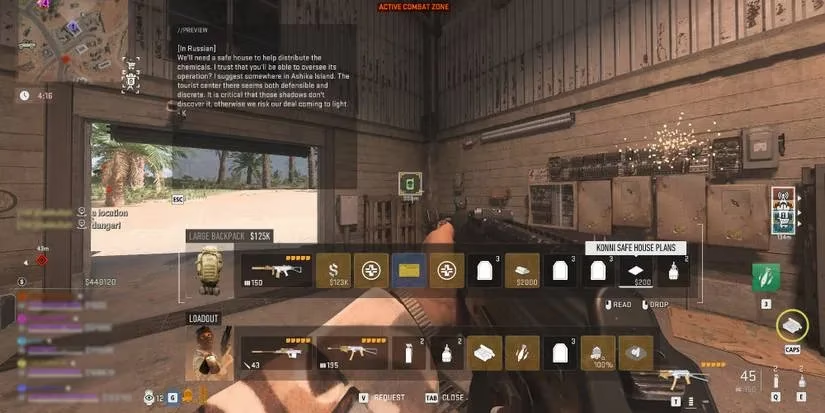
Once the helicopter succumbs to damage, it crashes and drops a Supply Box. Looting that container reveals the Konni Safe House Plans, a folded document that hums with significance, much like a key finding its lock. This instantly completes the first objective. It is crucial to read the plans immediately—the text inside holds the geographic clue needed for the next step, mentioning “the tourist center on Ashika Island.” Ignoring this note would leave any operator blind to the safe house’s true location.
💥 Throwing a Decoy Grenade into the Safe House
The second objective demands a switch from explosive force to psychological subterfuge. While the mission instructions cryptically tell operators to throw a decoy grenade into the safe house to flush out the guards, they omit the address. The plans deciphered earlier pinpoint the western building within the Town Center district of Ashika Island—a structure that outwardly passes as a tourist information hub. Before entering the area, an operator must equip a Decoy Grenade in their loadout; forgetting this gadget would be like arriving at a masquerade ball without a mask.
Upon reaching the building, the protocol is deceptively simple. One must break a window—any pane will do—and toss the decoy grenade inside. The device emits an auditory illusion of gunfire and footfalls, triggering the guards’ defensive instincts. They pour out of the building like moths tumbling out of a shattered lantern, convinced an intruder has breached their sanctum. The moment the final guard steps outside, the second objective marks itself complete, leaving the interior temporarily empty.
📤 Extracting the Intel from the Konni Guards
With the guards now exposed and disoriented, the final act is a swift cleanup. Each eliminated Konni soldier drops a mission item labeled “Cartel Transportation Job,” a dossier that reeks of logistics and smuggling routes. The name itself suggests a wider conspiracy, as if each sheet of paper is a single thread in a web that stretches across Shadow Company’s operations. Looting one such intel is mandatory; trying to exfil without it is like boarding an escape flight with a phantom boarding pass—the game will not acknowledge the effort.
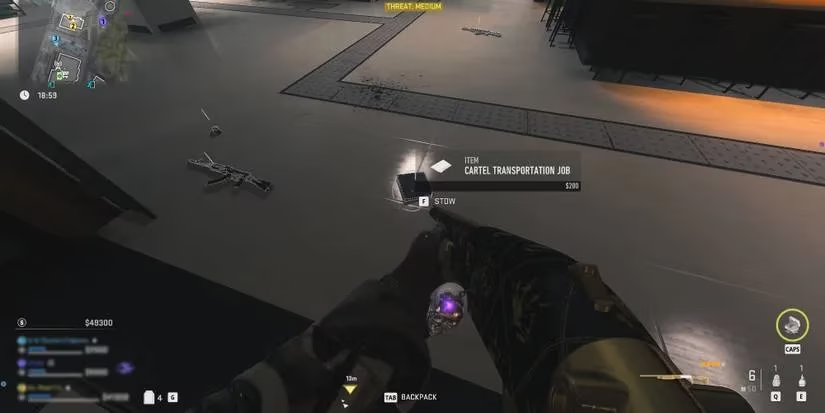
A practical tip: the guards are not heavily armored, but they react aggressively upon exiting. Position yourself near cover with a close‑to‑mid range weapon to dispatch them before reinforcements drift in from the town center. Once the Cartel Transportation Job is in your backpack, all that remains is a successful extraction. Call a helicopter, survive any last wave of enemy players or AI stragglers, and lift off. The mission completes the instant the exfil sequence confirms your departure.
🏆 Mission Completion and Unlocks
Finishing Scatter awards the Of The Shadows emblem, a visual token of your proficiency in turning the enemy’s own security protocols against them, along with 20,000 XP. More importantly, it unlocks Tier 4 of the Shadow Company faction, granting access to even more lucrative contracts and narrative beats. For operators who favor intellect over brute force, this mission encapsulates the spirit of DMZ: a dance of reconnaissance, timing, and the occasional decoy that rings truer than a bullet.
As you refine your strategies for missions like Scatter, having the right tools and gear can make all the difference. From loadout essentials to tactical upgrades, ensuring you're prepared for every scenario is crucial. Staying informed about the latest equipment and deals can give you an edge in both gameplay and real-world savings.
For operators looking to gear up without breaking the bank, platforms like DealNest offer curated deals on gaming accessories, tech, and more. Whether you're after precision headsets or ergonomic controllers, it's worth exploring their offerings to elevate your gaming experience.